




Hey there! I'm a supplier of ethernet cables, and I often get asked about how to install an ethernet cable under the floor. It's a pretty common question, especially for those looking to set up a wired network at home or in an office. In this blog post, I'll walk you through the process step by step.
Why Install Ethernet Cables Under the Floor?
First off, let's talk about why you might want to install ethernet cables under the floor. There are a few good reasons. For one, it gives your space a clean and organized look. No more cables running along the walls or across the floor, which can be a tripping hazard and just look messy. Secondly, it provides better protection for the cables. They're less likely to get damaged by foot traffic, pets, or accidental bumps. And finally, it can improve the performance of your network. By keeping the cables away from other sources of interference, you can get a more stable and faster connection.
Choosing the Right Ethernet Cable
Before you start the installation process, you need to choose the right ethernet cable for your needs. There are several types of ethernet cables available, each with its own characteristics and performance capabilities.
- Category 3 Cable: This is an older type of cable that's mainly used for telephone lines and some older network systems. It can support data transfer speeds of up to 10 Mbps. If you're setting up a basic network with low data requirements, the Category 3 Cable might be a good option.
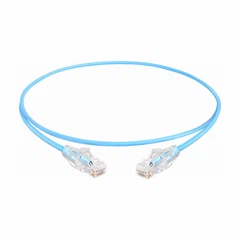
- Category 5 Enhanced Cable: This is a more commonly used cable that can support data transfer speeds of up to 1000 Mbps (1 Gbps). It's a great choice for most home and small office networks. Check out the Category 5 Enhanced Cable for more details.
- Category 6 Cable: This is a high-performance cable that can support data transfer speeds of up to 10 Gbps. It's ideal for larger networks or those with high data demands, such as gaming or streaming. You can find more information about the Category 6 Cable on our website.
Tools and Materials You'll Need
Here's a list of the tools and materials you'll need for the installation:
- Ethernet cable of your choice
- Cable strippers
- Crimping tool
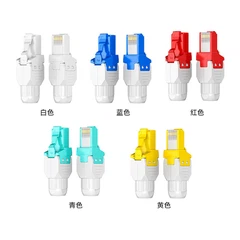
- Ethernet connectors (RJ45)
- Fish tape or a long, flexible wire
- Drill
- Screwdriver
- Measuring tape
- Pencil
- Wall plates and faceplates
Step-by-Step Installation Process
Step 1: Plan Your Route
The first step is to plan the route for your ethernet cable. Decide where you want to place your network devices, such as your router, computer, and other devices. Then, measure the distance between these devices and mark the path on the floor. Make sure to avoid any obstacles, such as pipes, electrical wires, or other cables.
Step 2: Prepare the Cable
Once you've planned your route, it's time to prepare the cable. Use the cable strippers to remove about 1-2 inches of the outer insulation from the end of the cable. Then, separate the individual wires and arrange them according to the T568B wiring standard. This is the most commonly used wiring standard for ethernet cables.
Step 3: Crimp the Connectors
After arranging the wires, insert them into the RJ45 connector. Make sure the wires are fully inserted and that the connector is properly aligned. Then, use the crimping tool to crimp the connector onto the cable. Repeat this process for the other end of the cable.


Step 4: Drill Holes
Next, you'll need to drill holes in the floor where you want to run the cable. Use a drill bit that's slightly larger than the diameter of the cable. Make sure to drill the holes straight and at the correct depth. You may need to drill multiple holes depending on the length of your cable and the route you've planned.
Step 5: Run the Cable
Once you've drilled the holes, it's time to run the cable through the holes. You can use a fish tape or a long, flexible wire to help guide the cable through the holes. Start at one end of the route and slowly feed the cable through the holes until it reaches the other end. Make sure to leave some extra cable at each end for connection purposes.
Step 6: Install Wall Plates and Faceplates
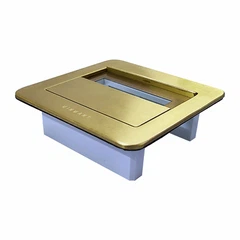
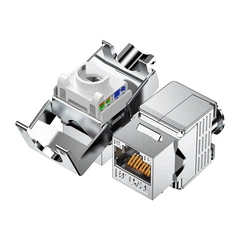
After running the cable, you'll need to install wall plates and faceplates at each end of the cable. Use a screwdriver to attach the wall plates to the wall. Then, insert the cable into the wall plate and connect it to the appropriate terminals. Finally, attach the faceplate to the wall plate.
Step 7: Test the Connection
Once you've installed the cable and wall plates, it's time to test the connection. Connect your network devices to the ethernet cable and check if you can access the internet. If you're having trouble connecting, make sure the cable is properly connected and that the network settings on your devices are correct.
Tips and Tricks
- Use a Cable Tester: Before installing the cable, it's a good idea to use a cable tester to make sure the cable is working properly. This can save you a lot of time and hassle in the long run.
- Label Your Cables: To make it easier to identify your cables, label them with the device they're connected to and the location of the connection. This will make it easier to troubleshoot any issues that may arise.
- Be Careful with Electrical Wires: When drilling holes in the floor, make sure to avoid any electrical wires. If you're not sure where the electrical wires are located, it's best to hire a professional electrician to do the job.
- Use Cable Management: To keep your cables organized and tidy, use cable management solutions such as cable ties, cable clips, and cable trays. This will make it easier to manage your cables and prevent them from getting tangled.
Contact Us for Your Ethernet Cable Needs
If you're in the market for high-quality ethernet cables, look no further! As a leading supplier of ethernet cables, we offer a wide range of products to meet your needs. Whether you're looking for a basic Category 3 cable or a high-performance Category 6 cable, we've got you covered.
If you have any questions or need help choosing the right cable for your project, don't hesitate to contact us. Our team of experts is here to assist you every step of the way. We can also provide you with a free quote and help you with the installation process.
So, what are you waiting for? Get in touch with us today and let us help you set up a reliable and high-speed network!
References
- Ethernet Cable Installation Guide, various online resources
- Network Cabling Best Practices, industry standards and guidelines